
Burn AVCHD to DVD with AVCHD to DVD Converter

Convert AVCHD to DVD with AVCHD to DVD Converter
"How to directly burn a DVD from canon camcorder vixia HF200 for videos? The videos shot on the canon camcorder are AVCHD format and MTS files. I tried copying to my computer and then burn a DVD but does not work."
DVD Creators like DVD Decrypter, Nero, DVD Flicker, Windows DVD Maker are all free DVD Burner on Windows. But they can't handle AVCHD videos that are from digital camcorders like Sony, Canon, Panasonic, JVC, Windows DVD Maker can only work with AVI, WMV, MPG files not AVCHD.
Don't worry, AVCHD to DVD Converter gives you a hand. With it, you can fast and easily convert AVCHD to DVD, burn AVCHD videos which are from digital camcorders like Sony, Canon, Panasonic and JVC etc to DVD to view on DVD player.
Secure Download
Secure Download
Besides burning AVCHD to DVD, AVCHD to DVD Converter also empowers you to convert other video files like AVI, WMV, MPG, MOV, MP4, FLV, 3GP, MOD etc to DVD. Furthermore, it also offers rich video editing functions for you to customize your DVD movie.
Step by step to convert AVCHD to DVD with AVCHD to DVD Converter:
Free Download AVCHD to DVD Converter
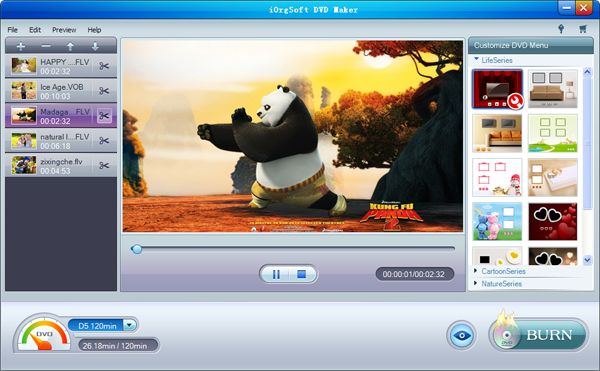
Free download iOrgsoft AVCHD to DVD Converter and install it in your computer. You can see its main interface.

Load video files
Click "File" button on the toolbar or click "File > Import" option from the main menu to load the your desired AVCHD files into the file list.
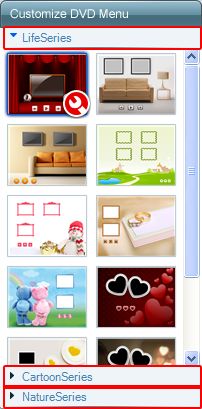
Create DVD menu
On the right of the panel below the Customize DVD Menu, there are three templates named LifeSeries, CartoonSeries, NatureSeries for you to choose from, select your favorite template from this Window to create a DVD menu instantly.
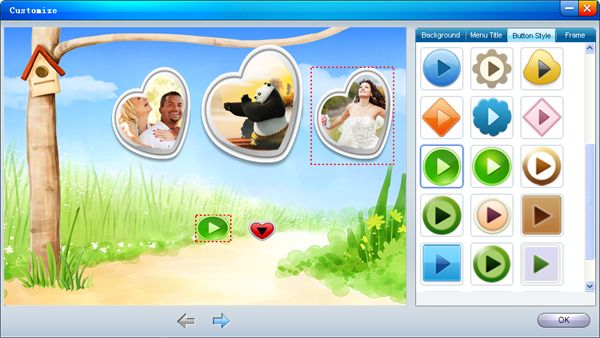
For further editing, please click the red circle setting button on your desired template to open "Customize" Window, where you can do the following settings like Background, Menu Title, Button Style and Frame.
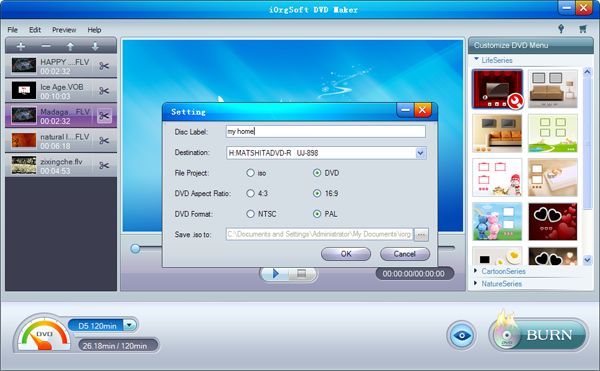
Adjust output settings and Start creating DVD
Click "Burn" button at the right bottom of the file list to start burning. Meanwhile set up the Destination: Insert a recordable disc, and choose the disc you insert from the "Destination" drop-down list. Or choose "Save iso to" option to back up your video files onto your hard disk as ISO file
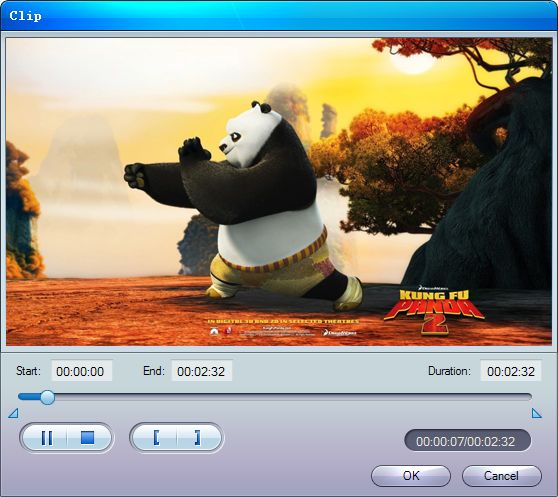
Optional: If you want to cut your video shorter, you can click the "Scissor" button next to the video you imported to help you clip your video by either setting the start time and the end time or drag the two slider bars to do it.
Related Articles
- Panasonic Lumix DMC-FZ150 AVCHD Progressive Converter
- Import Sony HDR-CX700 video to Mac
- Useful AVCHD to MP4 Converter Simply Convert AVCHD to MP4
- Camcorder to DVD maker
- Burn Flip videos to DVD movies
- Rip Cyber-shot DSC-HX5V Video to DVD
- Create DVD from WMV
- The smart choice for you to burn/convert MP4 to DVD with MP4 to DVD Maker


