AVI to DVD maker for mac lion

Best AVI to DVD Maker Mac for burning AVI to DVD on Mac without any conversion
“I have download shed loads of films (.avi) on my Mac and need to convert them DVD (Video_TS and Audio_TS folders) Player. I was wondering if anyone knows of an easy to use AVI to DVD Converter for MAC. Freeware would be great but I'm also willing to pay for a good one. Thanks in advance!”
Quick Information for AVI:
AVI, standing for Audio Video Interleave, is a special case of the RIFF (Resource Interchange File Format). Defined by Microsoft, AVI files are a common format for compressed video clips. Files downloaded from the internet often use this format.
Solution to burn AVI to DVD:
If you want to enjoy AVI video files on DVD player or on TV with family or friends at home, you'd better burn them into DVD at first. In this case, having a great AVI to DVD creator to burn AVI to DVD without rendering is the best choice for you!
To meet this need, you can freely take iOrgSoft AVI to DVD Maker for Mac Lion to help. This is a versatile and useful Burner for you to burn AVI to DVD with ease. In addition, this program supports burning almost all kinds of format files to DVD with the home DVD Player accepted format. You can also design your own DVD menu with customizing the background image and music, title, as well as the buttons and preview frames of every single video.
Secure Download
Secure Download
Useful or not, you may first make use of this AVI to DV DVD Maker Mac with the following guide. Then you’ll know how amazing it can be.
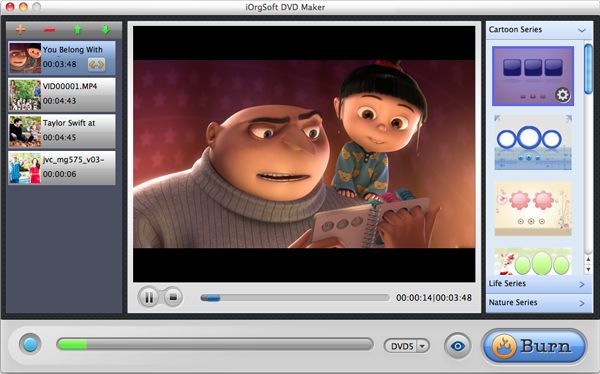
Import AVI files
After downloading and installing the AVI to DVD Burner Mac, you should add AVI videos to the program. Click the “+” icon on the top-left corner to add AVI videos. The number of importing RMVB files depends on the DVD storage.
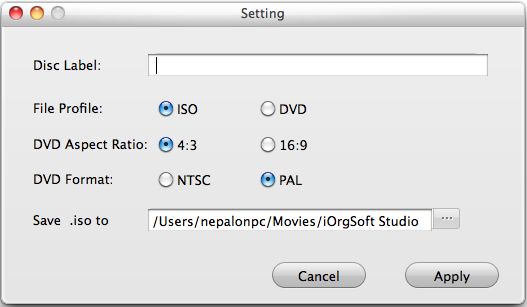
Setting further parameters
For step two, you can set about the parameters like output file type, aspect ratio, DVD formats, etc. Hit “Burn” and there’s the “Setting” window for you to do all those settings.

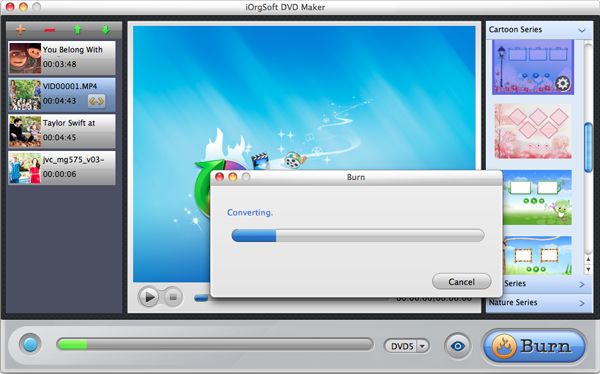
Begin the burning on Mac
When finishing all further setting in the “Setting” window, you should Insert a blank DVD disc to your computer. Then you can strike “Apply” for starting the burning work. After that, you can just wait for some time for the burning. Later when it finishes, you can play back the videos on your DVD player.