
JVC Everio to DVD Maker mac

How to burn JVC Everio footages to DVD on Mac for playback on home DVD player?
“I’ve got a JVC Everio camcorder. Few days ago I uploaded a video I taped onto the Everio Media Browser software. I burnt it to a DVD. However, the DVD doesn't work on the DVD players, even though I tried it on the computer, it just came to the same end. The Video format is H.264. All I want to do is convert it to a DVD so I can watch it on the TV via DVD player. I'm not overly tech-savvy!”
Well, owning one HD camcorder like JVC Everio is just cool which you can shoot amazing videos anywhere and anytime. After the wonderful journey in shooting footage, you may want to edit and burn videos to DVD to share the videos with your family and friends or to save your precious memories to durable DVD discs, right? Here we highly recommend one simple yet professional JVC Everio to DVD maker which can convert JVC Everio to DVD without any hassle.
iOrgSoft Mac JVC Everio to DVD Maker is just what you need to convert JVC camcorder videos to DVD and then burn them to DVD for home DVD player to play. This is because that inside this DVD Maker, there’s a powerful and efficient converter to convert all kinds of videos for burning. Also, you can use this program to DIY your DVD menu by customizing the background image, music and title, as well as the buttons, etc.
Secure Download
Secure Download
With the following passage, you’ll learn how to use the JVC Everio to DVD Maker Mac to burn JVC Everio camcorder files to DVD easily on Mac without iDVD.
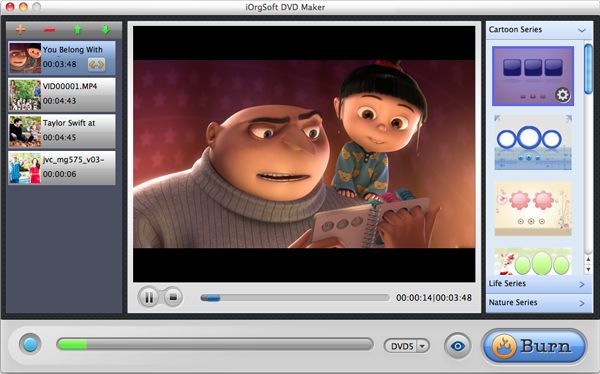
Select the JVC Everio footages for importing
You can import JVC Everio camcorder files to the program by clicking the “+” icon on top left. The number of importing files is decided by the DVD storage.
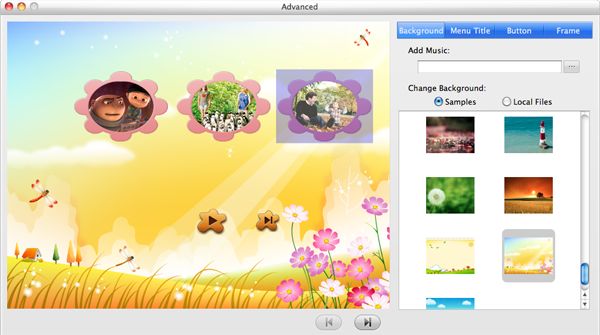
DIY the DVD Menu
In the right side of the DVD Maker, you’ll see three categories of the Menu templates. Choose the favorite one from the templates and then move your cursor to the template, there appears a “Tool” icon, hit it to enter the customize mode. Then you can see options of “Background”, “Menu Title”, “Button”, and “Frame”, which mean that you can personalize those elements of your DVD menu. Just begin to DIY your own style DVD menu!
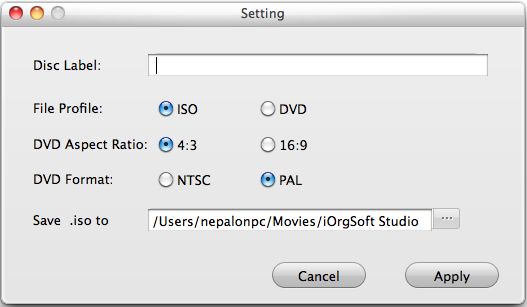
Do further setting
Before burning, you’d better set about the parameters like output file type, DVD formats, etc to make sure the burnt DVD is made for your DVD player. You can do all these by clicking “Burn” for popping up the “Setting” window.

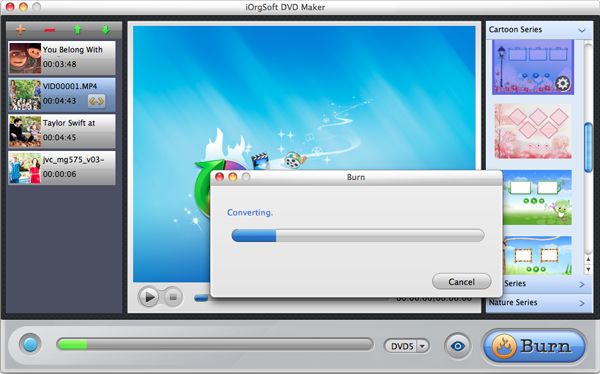
Burn JVC Everio footages to DVD on Mac
When finishing setting in the “Setting” window, you may hit “Apply” to begin burning at once. Remember to insert a blank DVD disc to the DVD-ROM in advance for burning. Then you should wait for a few minutes, and when the burning is finished, you can play JVC Everio camcorder footages on your DVD player.
Related Articles
Hot Article
- Useful AVCHD to MP4 Converter Simply Convert AVCHD to MP4
- How to Edit MTS Files with MTS Editor
- XAVC Converter for Mac
- Convert MXF files on Mac
- MTS to DVD maker for mac lion
- How to Convert XAVC to MP4 on Windows and Mac OS X
- Import MTS to Final Cut Pro on OS X Mountain Lion
- Import MTS files to iMovie 08, 09, 11
- Convert MXF to DVD Mac


