Vimeo to DVD Burner Mac

Tips on burning Vimeo videos to DVD on Mac for freely playing back Vimeo video via DVD player
Wanna burn the Vimeo videos to DVD on Mac? Want to play back your burnt DVD via your home DVD player? Need an all-in-one tool so that you do not need to worry about the codec problem before you adding to burn? You can easily achieve all of those requirements with iOrgSoft Vimeo to DVD Maker for mac, which is powerful enough for you to import all format files and burn them to DVD with the acceptable format for DVD player.
More than that, Mac Vimeo to DVD Creator is such a useful program that allows you to DIY your DVD menu with adding the personalized background image and music, as well as the preview video frames and buttons. You can freely output NTSC DVD or PAL DVD due to the system of your DVD player. With it, you don’t need to worry about your videos are in an incompatible format with iDVD any more as it can do both converting and burning works with its own.
Is this DVD burner difficult to use? Not at all. You can easily finish burning Vimeo videos to DVD with simple clicks. Do like the guide shown you below:
Add Vimeo videos to the burner on Mac
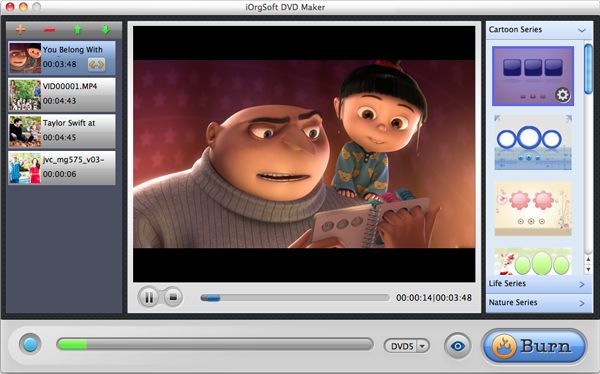
To import the videos, you should click the “+”/“File” button on the top-left corner. And you can select the videos you want to burn then.

Do further setting for your output DVD
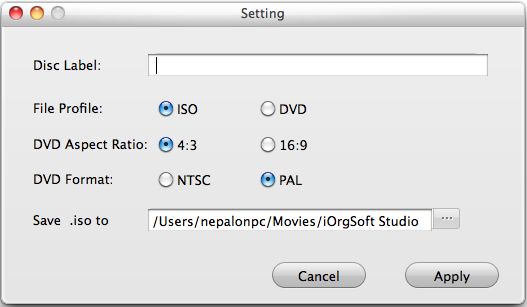
If you simply want to burn your videos to DVD and without any customization, you can go straight to set further parameters for the output DVD. (If you want to design your own DVD menu, click here to learn.) Just hit the “Burn” button, and the “Setting” window will pop up for you to set about output format (ISO/DVD), DVD Aspect Ratio (4:3/16:9), DVD Standards for DVD Player(NTSC/PAL), etc.
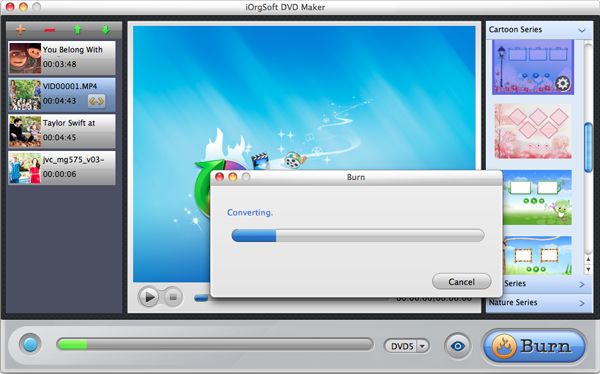
Hit “Apply” to begin the burning
(Before conducting the burning work, make sure you’ve inserted a blank DVD disc, or you’ve chosen outputting ISO file for future burning. )When finish setting the specific parameters, you should hit “Apply” button on the “Setting” window, then the burning will begin immediately.
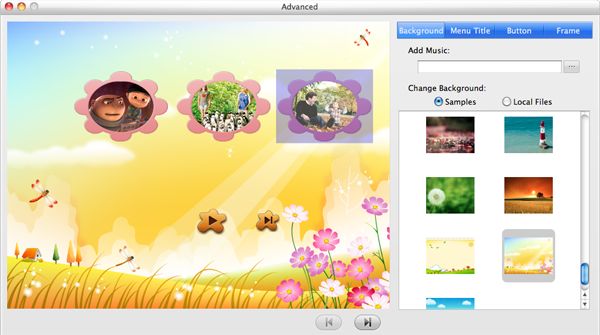
Optinal Reading: Create your own style DVD Menu
First of all, you can do all the customization with the Customize Panel on the right side of the program. Then, select a template from the three categories. Move your cursor above the selected template, and hit the appeared “Tool” button, then you are switched to the customize mode. In the customize mode, you can freely personalize the background image or music of the DVD Menu template, also the buttons and frames. After the personalized job, you can preview the final effect by hitting the “Eye” icon at the bottom of the DVD burner interface.