
RMVB to Apple TV Converter

RMVB files have become a popular format for Anime and Asian movie titles because they have smaller file sizes and lower bitrates with better quality compared to DivX (.DVX) files. In order to play .rmvb files on portable players such as Apple TV, you may need to convert RMVB to ATV acceptable file format such as MP4. To do so, you can try an online conversion service like Zamzar.
If you prefer to desktop program that can do the conversion, you can choose iOrgSoft RMVB to Apple TV Converter, which is featured with intuitive interface. Only several mouse clicks are enough to the conversion program. For your convenience, the application provides optimized presets for other iDevices such as iPad, iPhone, iPod Touch.
Secure Download
Secure Download
Tutorial on How to convert RMVB for playback on Apple TV:
Add .rmvb file into the RMVB to Apple TV Converter
After installing the Apple TV Converter, run the application. Then, click "Add" button to locate .rmvb videos into the program.

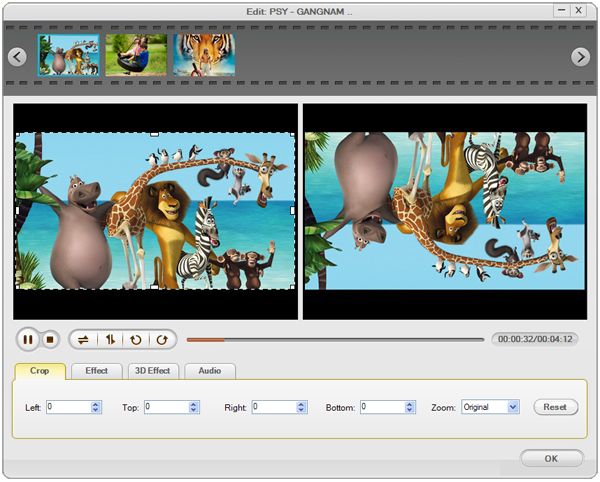
Crop video (if needed)
Go to "Crop" tab in the "Edit" window. You’ll see cropping handle in the preview window. Adjust those handles to adjust the size of the crop area. In addition, there are three preset aspect ratios in the Zoom list: 16:9, 4:3 or original.
Select Apple TV video as file format
In the drop-down list of "Profile", you can directly select Apple TV video as output format.

Run the conversion from RMVB to ATV
Hit "Start" button to launch the RMVB to Apple TV conversion. When the conversion is done, you can transfer the output file to Apple TV, after connecting Apple TV to HDTV.

Related Articles
- How to convert RMVB files to WMV/DV/MPG/AVI/MOV with the RMVB to WMV converter freely
- convert rmvb to mpg/mpeg-4,2,1.
- Put FLV Videos to Apple TV for Better Enjoyment with Apple TV Video Converter
- How to Convert AVI to Apple TV on Windows and Mac OS X
- WMV to Apple TV Converter
- How to Convert 3GP to Apple TV (Apple TV 3 included)
- How to Convert MOV to Apple TV


