
iOrgsoft Video Editor is a perfect video editing software for easy editing video with powerful video editing functions like video clip, video crop, video merge, video effect, video transition for you to split, cut, join, merge video, add special effect to your video, add transition like image, audio, and text etc on Windows
Secure Download
Secure Download
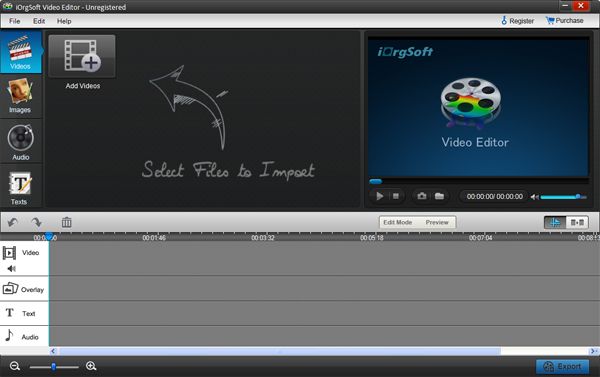
After free download Video Editor, Click Add Videos on the topper left panel to add files to add. As batch process mode is supported. You can load as much file as you want.
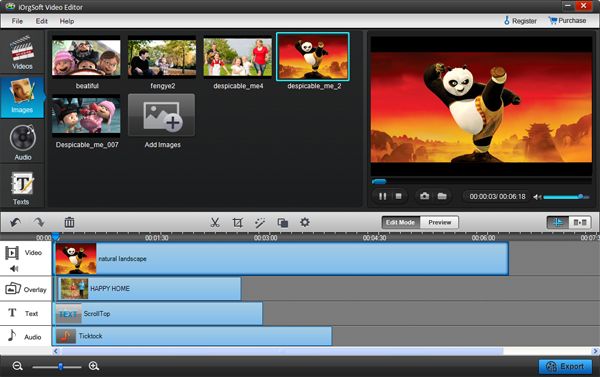
Drag the video file to the timeline below, you can do the following editing:
Clip: Drag the video file to either Video A or Video B in the timeline, hit the video, click "Scissors" button to cut the videos when it comes to the position you want.
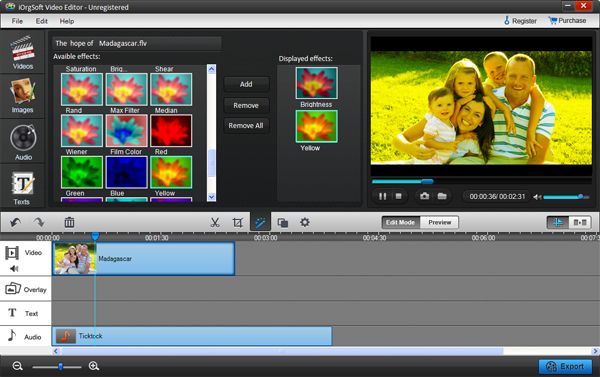
Crop: Hit the video in the timeline, and then click Settings on the top of the panel to pop up an interface where you can crop you video files, you can crop off your video in the directions of left, right, top, bottom, and also, you want rotate the video in the same four directions
Effect: Still on the same Settings tab, you can tweak you video brightness, contrast, saturation and hue from Video sub-tab, add special effect to your video from Effect sub-tab (there are more than 50 special effect available from three main categories: Adjust, Distortion, Filter). Besides, you can also make editing for audio like Volume, Fade in and Fade out.
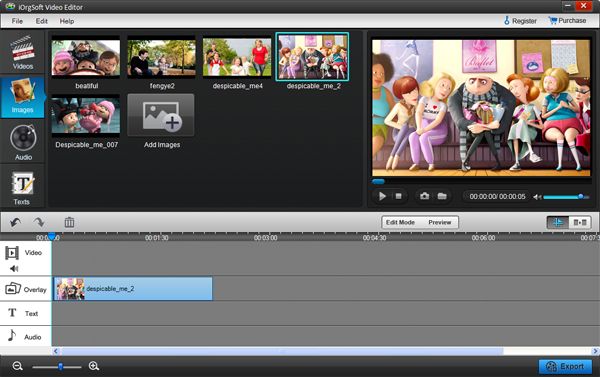
On the bottom of the panel, there is timeline with five layers: Text, Video A, Transitions, Video B and Audio for you to add image, audio, text as transitions between videos. Besides, you can also add special transition from Transition tab on the top of the panel which can be choosing from "Fade", "Slide" and "3D" sub-tab of Transition to make more professional video
After all the video editings have been done with iOrgsoft Video Editor, click Save and publish to do output settings like: output format, output path, output video and audio settings
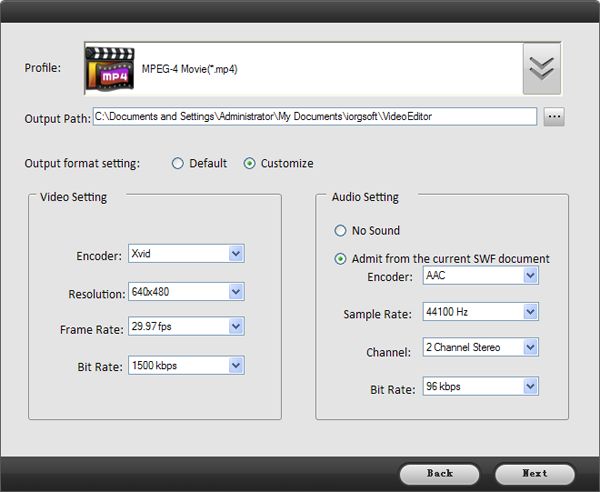
After choosing the output format and path, click Next to begin convert.
$59.95
Transfer PDF to Word, Text, Image, Epub & HTML fast, maintaining original layout, hyberlink, etc
![]()
![]()
$39.95
Make DVDs from common videos in formats like mp4, wmv, mkv, mov etc to DVD fast and easily.
![]()
![]()
$35.00
Convert nearly any SD and HD video format to popular video formats with zero quality loss.
![]()
![]()


Terms & Conditions| Privacy| Sitemap| Contact Us| About Us| Affiliate| Newsletter| License Agreement| Uninstall
Browser compatibility : IE/Firefox/Chrome/Opera/Safari/Maxthon/Netscape
Copyright © 2007-2016 iOrgsoft Studio All Rights Reserved