
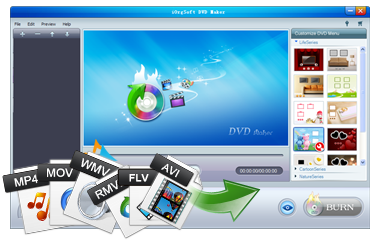
iOrgsoft WMV to DVD Maker offers an easy and efficient solution to convert/burn WMV videos to DVD with great video quality.
Secure Download
Secure Download
WMV format is best compatible with Windows platform. When you have completed a project on Windows Movie Maker, you can export the project as .wmv file. If you don't just want to save your WMV videos on computer but want to share them with others, it's a good idea to make a DVD with them. But how to achieve it easier? iOrgSoft WMV to DVD Creator would tell you how to burn WMV to DVD easily.
| Professional DVD Burner | Professionally, this DVD burner can burn WMV videos to DVD disc directly as well as to ISO files which for further burning easily. After upgrade, it can also burn other videos as MP4, AVI, MKV, etc to DVD. |
| Create and Customize DVD Menu Templates | This DVD burner offers many DVD menu templates as options. If you don't like the tempalte background, it's fine to replace it with your favorite image. Menu Background, title, button, frame, etc are customizable. |
| Support Various DVD Disc Formats | This software supports popular DVD disc formats like DVD-R, DVD+R, DVD-RW, DVD+RW, DVD+R DL, DVD-R DL, DVD-5 and DVD-9. And it allows setting TV Standard between PAL and NTSC with aspect ratio between 16:9 and 4:3. |
Launch the program and insert a blank DVD disc if you got an available one. If not, never mind. You can choose to burn WMV to ISO files first.
Note: If you got a DVD disc, please make sure it is compatible with your DVD player or it can't be played.
And then, please load WMV files that need to be burned onto a DVD to the program by clicking "File>Import" or "+". Please make sure the total video length doesn't exceed the total DVD capacity.

Alternatively, you can customize the imported WMV videos before you burn them to DVD.
You are allowed to just get the favorite plot of the video to burn to DVD instead of the whole file. Use the scissors tool to help you cut it off.
Besides, click the pencil icon next to the scissors and then you'll find more editing tools. The "Crop" function allows you to resize video and change aspect ratio, rotate or flip video. The "Effect" enables you to change video brightness, contrast, and saturation, add old film, gray, or emboss effect. The "3D Effect" lets you convert 2D to 3D. The "Audio" allows adjusting audio volume in video and applying audio fade-in or out effect. The "Watermark" lets you add image or text type watermark.

On the "Customize DVD Menu" panel, there are many optional built-in DVD menu templates.
Please choose one if you like to apply template to your DVD. And for your choice, you can change the default template background with your image saved on computer. To make your DVD more attractive, you can add background music as well. And there are different template buttons and frames for your choice. You can even add text to customize the menu. All these can be done by clicking the editing tool on the selected template.

Hit "Burn" button to enter the "Settings" section. Go to type Disc label, select destination, choose to burn to ISO or DVD, decide to use template or not, choose aspect ratio of DVD, set TV Standard (PAL or NTSC).
After the settings are well done, please press "OK" to start burning WMV to DVD. If your files are very large, it would take a longer while to complete.

Secure Download
Secure Download
Burning AVI videos to DVD discs is not that difficult to do as long as you get a professional DVD authoring tool to help. With iOrgsoft AVI to DVD Creator, you can easily perform this process without any problem. However, if you want to finish the DVD creating perfectly, you'd better follow the simple tips we are going to share with you below:
1. Firstly, if you want to create an HD DVD movie, your source video files needs to be HD quality. Though iOrgsoft DVD Creator can automatically retains the video quality after the conversion, no program can improve the quality of the original video. That's why you need to take extra care while choosing the file you want to burn.
2. Note that the DVD creation is fully customizable. What the final result will be like is totally rely on your creativity, so think outside the box and try yourself to make interesting DVD menu. Add menus, titles and other things you need to the DVD, they will surely make it look more personalized.
3. Always remember to preview the output effects before you burn it to DVD in case any problem occurs. It may be a little troublesome that you might need to repeatedly modify your project several times, but creating a great and unique DVD does take a lot of time.
4. Remember to modify the TV standard to the one that's supported in your area. It can be NTSC and PAL, but always remember to check that your DVD player is compatible with your output TV standard, otherwise your DVD won't work.


Terms & Conditions| Privacy| Sitemap| Contact Us| About Us| Affiliate| Newsletter| License Agreement| Uninstall
Browser compatibility : IE/Firefox/Chrome/Opera/Safari/Maxthon/Netscape
Copyright © 2007-2016 iOrgsoft Studio All Rights Reserved