
AVI Converter is an easy-to-use video converter which can convert almost any type of video files to AVI format while it is also able to convert AVI to commonly used regular video formats including MP4, MOV, FLV, WMV, M4V, etc.
Secure Download
Secure Download
Want to play MPG files on your PSP, Xbox or other media players that plays AVI format but have no idea to make your machine understand MPG format? You'll find the solution here. MPG is not compatible with PSP, Xbox, Google Android-based smartphones, while AVI is more popular. In cases like this, you need to convert MPG to AVI. And sure you need a reliable converter like iOrgSoft AVI Converter to help you.
| AVCHD to AVI | Got some AVCHD recording on your Canon camcorder and want to import them on Windows Movie Maker for further editing? WMM doesn't recognize AVCHD format but AVI format. So, it's a good idea to convert AVCHD to AVI. |
| MOD to AVI | Have shot some wonderful MOD videos on your JVC camcorder? And want to watch them on TV with your family? You might need to convert MOD footage to AVI first before you can play them on TV smoothly. |
| MPG to AVI Mac | MPG is unacceptable by some media device like PSP, Xbox, etc. So, if you want to play MPG files on PSP, PS3, Xbox, etc, you have to change MPG vidoe format to AVI that is well supported by them with AVI Converter. |
| MKV to AVI | If you want to play MKV files on Xbox 360, you might find it not supported by Xbox 360. In this case, the easiest way to make MKV playble on Xbox 360 is to change MKV to Xbox 360 supported format, like AVI. |
Troubling play AVI footages from your digital camcorders like Cannon camcorder on iPad or iPhone? Sometimes you'll find your Apple device plays some AVI files while can't play some other. That's because there are AVI files with different codec. Some are AVI Motion JPEG videos and some are AVI with Xvid, or DviX codec. So, you need to convert AVI to other more easy-to-play format like MP4 for playback.
| AVI to iPhone | Apple iPhones can only support certain type of AVi files, Motion JPEG (M-JPEG). For most AVI video files with Xvid or DviX codec, you need software like iOrgSoft AVI Converter to convert AVI to iPhone for further playback. |
| AVI to MP4 | Compared to AVI, MP4 is more popular and easy-to-use. If you have some AVI files that are difficult to be played on your deviced or apps, you might as well convert AVI to MP4 format that is well supported by most media devices. |
| AVI to iMovie | Like iPhone, iMovie can only read some type of AVI codec. If your AVI file is compressed using a codec that iMovie can use, iMovie will refuse to play it. To solve this problem, you can convert AVI to iMovie supported format. |
| AVI to Samsung Galaxy S3 | Samsung Galaxy S3 plays AVI with codecs of Divx or XviD. But how about AVI with codec of Motion JPEG? To play AVI with MJPEG codec, it is suggested to convert AVI MJPEG to Samsung Galaxy S3 supported MP4 or WMV etc. |
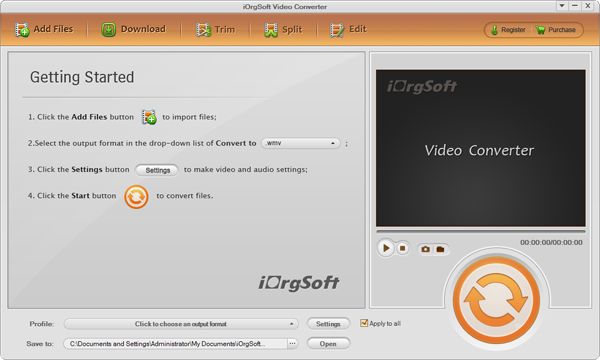
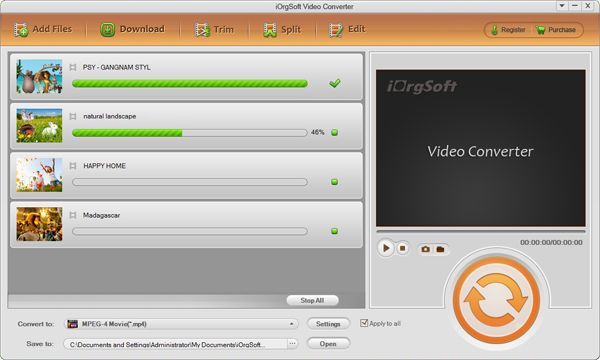
Please download and install the program and then launch it. And then you'll find the "Getting Started" guide. Please read it carefully before you move on. And then, to get started, please click "Add Files" to load media files. Alternatively, you can directly drag and drop the files to the program.
Note: you are allowed to add a few files at one time since batch conversion is supported. And if you want some screenshots, you can play the video on the video preview area on the right side of the main interface and then click the camera icon to take screenshots.
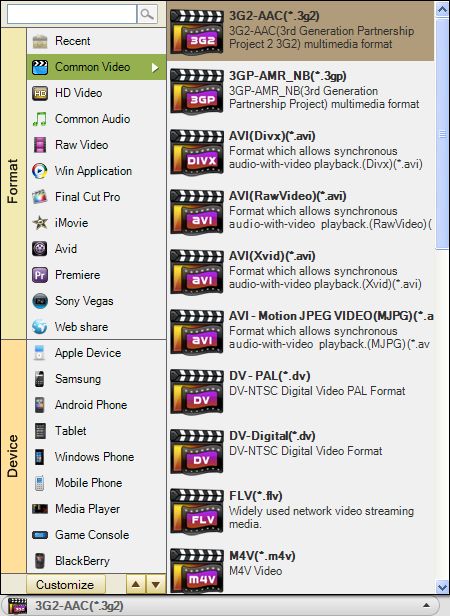
The next step is to choose an output format. There are two ways to reach the output formats list. First one is to get it from the "Profile" option list and the second is to find it by clicking the format icon next to the added file.
When you get to the format list, you can go find the desired regular output format from "Common Video". Or you can go to the "Device" category to find your device name and related output format.
Note: if you have loaded several files at one time, you can select different output formats for them one by one. If you want play them on the same device, you can go to check the "Apply to all" box to choose the same output format for all files at one time.
After you choose an output format, you can move to the "Save to" to change the default folder to locate your converted file. Please make sure the location you choose has enough room for your converted files.
Note: After choosing the output format, you can change the default output settings to adjust the conversion quality by clicking the "Settings" button next to the "Profile" option. You should know well that the conversion quality can be affected by many factors including resolution, frame rate, bit rate, encoder, etc.
Trim: go to "Trim", there are 3 ways to trim file.
1. Drag the triangle button on the timeline
2. Press the square brackets during playing file
3. Input exact value to "Start Time" and "End Time" blank, press "OK" to confirm
Note: you can press "+" and "-" to add or delete clips. You can see how many clips that you have trimmed from the bottom table. And you are able to merge them all into one.
Split: go to "Split", there are 2 ways to split a large file into several smaller clips.
1. Split by duration
2. Split according to how many smaller clips you want to get
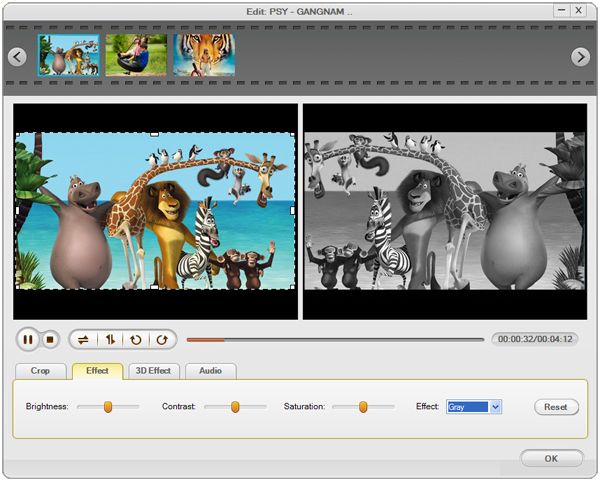
Edit: go to "Edit", there are more editing functions available including cropping, rotating, flipping, zooming, watermark (image or text), adjusting video effects (brightness, contrast, saturation), adding special effects (old film, gray, emboss, 3D effects), adding video and audio transition effect (fade in and fade out).
Hit the convert icon, the orange and round one lower the right corner of the main interface, and then the program starts to do the conversion. See, it is so easy to process the video conversion. After it is completed, it will ask you whether to open folder to play the converted file or not.
Note: The program is available for Windows and Mac Users. Windows version is workable on Windows 8, 7, XP, and Vista while the Mac version is on Mac Mac OS X 10.9, 10.8, 10.7 and 10.6, Mac OS X 10.6, 10.5 and 10.4, Power PC.
Secure Download
Secure Download


Terms & Conditions| Privacy| Sitemap| Contact Us| About Us| Affiliate| Newsletter| License Agreement| Uninstall
Browser compatibility : IE/Firefox/Chrome/Opera/Safari/Maxthon/Netscape
Copyright © 2007-2016 iOrgsoft Studio All Rights Reserved