
How to Recover Word, Excel and PPT Documents on Mac

When you lost a document such as Word, Excel or PPT, the first thing you can do is to find them in the Trash. If they are not in the Trash, your document is really lost and if you want to retrieve them, you need some apps like iOrgsoft Data Recovery for Mac (Data Recovery) to help you.
Sometimes, when we are using the documents on Mac, we may lost the documents, for example, we are editing a Word without saving changes but we are force to quit the program; an Excel is under editing but the power suddenly off; the PowerPoint is corrupted for no clear reasons. If you come across such problems, keep calm and stop using your Mac at once, for there is chance to get the document back with the help of iOrgsoft Data Recovery for Mac.
iOrgsoft Data Recovery for Mac is a great tool for Mac users to recover files including documents, videos, songs, images, etc. from iMac, MacBook, iPod and other external storage devices like, USB drives, SD card digital camera, and mobile phones. The intuitive interface can help you retrieve your documents via several simple clicks.
Secure Download
Secure Download
Step-by-step guide on recovering lost document on Mac
Now download and install the document recovery software on your Mac, follow the guide below to see how to recover documents on Mac (Mountain Lion included).
Choose a data recovery mode
Follow the installation instruction to run iOrgsoft Data Recovery application. In the primary window, choose Lost Data Recovery. In this mode, this program will quickly find your lost documents on your drives. But sometimes, it cannot find the files you need. If this happens, turn to the second mode "Raw recovery", which will perform a deeper scan to search your files.

Select a drive and start scanning lost files
Now you need to select the drive where you lost your documents, then hit "Scan" on the top to search your lost files. If the drive is not in the list, restart the app and repeat the steps above. Before scanning, you can use "Filter" feature to select the file types you want to recover, this will save much time when scanning.

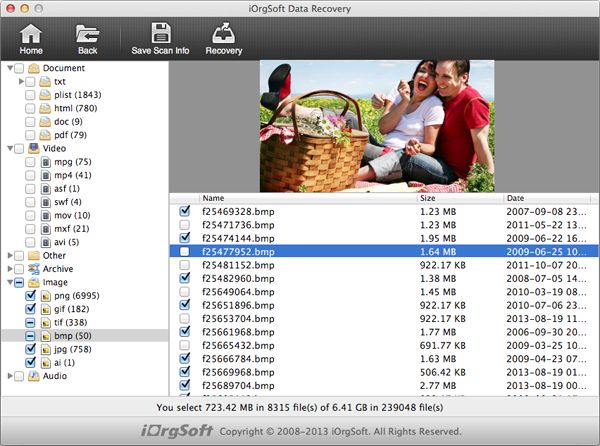
Preview and recover documents
When scanning is over, go to the folders on the left panel to find your lost documents, you can preview them on the top window to confirm whether they are exactly what you are looking for. To recover a folder, you just need to click the checkbox and hit "Recovery" button on the top, soon, your lost files will be back to your Mac.
Related Articles
Hot Article
- How to Recover Data from Formatted Hard Drive on Mac
- How to Recover Lost Files on Mac
- How to Recover Files after System Recovry on Mac
- How to Recover Deleted Items from Trash
- Mac Trash Recovery: Recover Emptied Trash Mac Safely and Easily
- How to Recover Word, Excel and PPT Documents on Mac
- How to Recover Files from SD Card
- Recover Files and Date fast and safe with Mackeeper Alternative-iOrgsoft Data Recovery
- How to Recover Deleted Data from iPhone 4/4S/5
- How to Restore iPhone Photos/Pictures on Mac


