
Mac Trash Recovery: Recover Emptied Trash Mac Safely and Easily

When we are using our Mac, sometimes we may emptied Trash to free more space to save new files on the Mac. In most conditions, it is safe to empty the Trash, but not all the time. Chances are we deleted some useful files when we emptied the Trash. If this is the case, what do you do if you want to retrieve the files? If you get no idea, do not worry, this article will tell you how.
Files that are deleted when the Trash is emptied are not deleted physically immediately; they are gone permanently till they are overwritten by new files. So, once you realize your files are emptied from the Trash, stop adding new files to your hard drive at once, which will increase the success rate when recovering Trash files.
Though the deleted files exist in the drive, they are inaccessible to you. And to recover them, you need some powerful tool like Data Recovery to help you. iOrgsoft Data Recovery Mac (Data Recovery) application is right the tool to help you conduct the recovery. With this tool, you can easily and safely recover emptied trash Mac. This Mac Trash Recovery software can help you recover virtually any file type including Word, Excel, PDF, PPT, TXT, HTML, email, MP4, MOV, MTS, MP3, PNG, JPG, and more.
Secure Download
Secure Download
How to Recover Deleted Trash on Mac
iOrgsoft Data Recovery for Mac can help your recover deleted files from empty trash with ease. Now download and install this app on your Mac, follow the steps below to recover your files.
Choose a file recovery mode
Finishing installation, launch the Mac Trash Recovery software. Choose the Lost Data Recovery mode when you see the primary window. In this mode, this app will scan your drive quickly to search the deleted files. If it failed to find the files you need, turn to the second mode Raw Recovery, which will perform a deep scan to scan your drive completely.

Select the drive where you lost files
Next, choose the drive where you want to retrieve your files. Then click the Scan button on the top to start scanning the selected drive. You can use the filter feature to select the file type before scanning, which will save much scanning time. Generally, all the logic drives can be detected by this app, but not absolutely, if the drive you need is not detected, re-start this app.

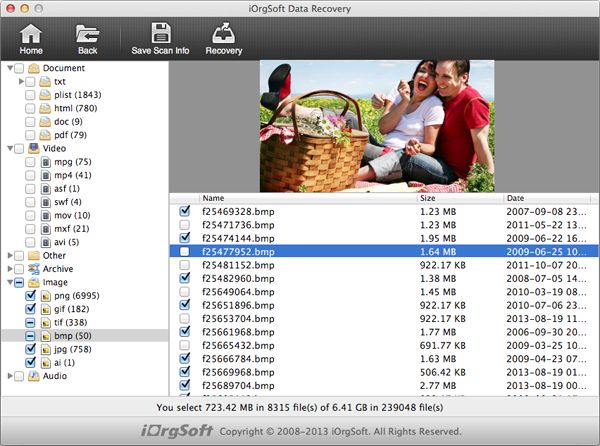
Preview and recover deleted files
When the scanning is completed, go to the Trash folder to find the files you need. All the recoverable files will be listed there. This Mac data recovery application enables you to preview documents and images to confirm whether the files are the ones you are looking for. To recover a file or a folder, click the box before the file, then press Recovery on the top, set a path to save the recovered files, at last, hit OK to start recovering Trash Mac. Soon, you will get back the files.
Related Articles
Hot Article
- How to Recover Data from Formatted Hard Drive on Mac
- How to Recover Lost Files on Mac
- How to Recover Files after System Recovry on Mac
- How to Recover Deleted Items from Trash
- Mac Trash Recovery: Recover Emptied Trash Mac Safely and Easily
- How to Recover Word, Excel and PPT Documents on Mac
- How to Recover Files from SD Card
- Recover Files and Date fast and safe with Mackeeper Alternative-iOrgsoft Data Recovery
- How to Recover Deleted Data from iPhone 4/4S/5
- How to Restore iPhone Photos/Pictures on Mac


